The Cases Module detail view is where case picking and case cart building take place. Learn how to navigate it in this section.

From the home screen, double click on a case to enter into that case's detail view.
Case Information
The case specifics are listed in the top left corner of the detail view.

Status
The case status color shown on the detail view corresponds with the color and meaning on the home screen list view.
- Incomplete - None, or some but not all, of the inventory needed for the case has been scanned to the case cart(s).
- Turn - The case is Incomplete and at least one of the inventory will need to be turned to be available for the case on time.
- Risk - The case is Incomplete and at least one of the inventory will not be available for the case. More severe than Turn.
- Complete - All of the inventory needed for the case have been scanned to the case cart(s).
- Complete and ToOR - The case is Complete and the case cart(s) are properly staged. The cart(s) are where the OR wants them prior to pulling them into the room for surgery, generally outside the OR room
- Cancelled - The case is no longer going to take place. It has been cancelled.

Case
The case order position. (1st, 2nd, 3rd)
Room
The operating room the case will take place in.
Date / Time
The date of the case and the scheduled start time.
Case ID
The unique case identification number from the EMR system.
Surgeon
The name of the surgeon scheduled to perform the case.
Procedure
The name of the specific procedure.
Case Picking Information
The case information will have an added field once picking is completed, the case is marked Complete, and it is delivered ToOR.
- Name of technician who completed the case picking
- Date of case picking completion
- Exact time of case picking completion
Top Right Buttons
Color Key
- Custom Add - If you scan an item and it is highlighted in pink, the item was not included on the preference card
- Custom Delete - EMRNeedsFix items and items removed from the case via Actions > Don't Need
- Picked - The requested item has been scanned to the case
- Need - The item requested is not sterile but there is plenty of time to process it before the case
- Turn - The item requested is not sterile and it must be taken through the process as soon as possible. There is just enough time to process before the case. If action is not taken, this inventory will become a risk
- Risk - The inventory will not be ready in time for the case.

Actions
- Print - Select to print the Case Cart Setup report.
- Cancel - Exit the detail view of the case without saving any changes.
Done
Save changes and return to the Cases home screen.
Top Left Buttons
Pick
Use the Pick button to assign a specific pRef to the inventory after using Actions > Add Item
Actions
- Add Item - Using the manual add function, select an item to add to the Need/Risk area of a case
- Add Case Cart - Select a case cart to assign it to the case. Use this option when you do not have a scanner available
- Don't Need - To remove the selected item from the list, select Don't Need. It will move to a different section (Don't Need at the bottom of the list) and it will not print on the Case Cart Setup report
- Locate - Find the specific location of the selected item
- Pick - Enter a pRef number to assign the associated inventory to the case. Use this option when you do not have a scanner available
- Unpick - Select an item from the list and use this option to remove the associated or recommended inventory from the case
Once an inventory has been assigned to the case via scanning or the Pick button, it can be unassociated with the case. The proper method of removing an inventory that was previously picked to a case is to deliver it to the proper location. Once scanned to another location, the inventory will drop off of the case. If the item is simply Unpicked, Sonar will not know where the set is now located.
Notes
Any additional notes about the case can be added to this field. The notes will print on the Case Cart Setup report.
Complete
Once the case has been fully picked, the toggle switch should be moved to Yes. In most cases, the Complete toggle switch should be changed to Yes before delivering ToOR. After the case has been completed, it cannot be changed to Incomplete status again.
If a workstation does not have a barcode scanner, you can still manually deliver items to a case cart using the Deliver Module. You can also manually pick items to cases using the Pick button in the Cases Module detail view.
ToOR
Once the case cart(s) are ready to be sent to the OR, the toggle switch should be moved to Yes. The ToOR toggle can be on Yes while the Complete toggle is on No. Once the switch is moved to Yes, the Case Cart Setup report will print.
Right-Click Options
With a row selected, right-click to open a quick menu

Don't Need
Remove an item from the list of required items for the case.
Remove Case Cart from Case
Select Remove Case Cart from Case to revert a case cart scan. Any items that were previously scanned to the case will remain in the Picked section. The case cart will drop off from the case and will not have any inventory associated to it.
Unpick
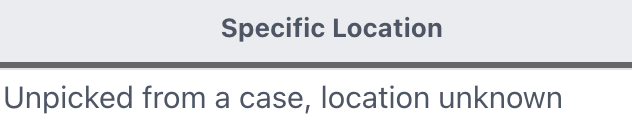
Select Unpick to remove an item that has been scanned to the case. The item will be removed to a "limbo" location. The specific location of the item will be listed in the locator as Unpicked from case, location unknown. Once the case is complete, the only option available in the right-click quick menu is the Unpick action.
Locating Items
Double click on linked items that have not been picked yet to view the location of each inventory related to the Item.

Double click again on a specific inventory to see the full scan history.

The specific inventory is not associated to the case until it is scanned. When it is easy, it is good to pick the recommended inventory number, but it is not required. Sonar will update the list accordingly if another inventory is scanned to the case.
Once a particular inventory is scanned to the case, a double click on the record will pull up the full scan history rather than the full list of item inventory locations.